I always find it easiest to learn new concepts when I can actually do something interactively to help me learn them. This next part of the git 101 series will introduce setting up a local workspace, connecting with GitHub, making your first commit, and pushing it to the remote repository.
Prerequisite: Create a GitHub Account
Github has become the de facto standard for hosting open-source on the internet. I will leave whether that is a good thing up to the reader to decide. For now, since it is currently so widely used, I’m going to use this as the default ‘remote’ that is responsible for storing your code.
As I mentioned in part 1, git by nature is distributed. That means that while GitHub will serve as the default remote hosting provider for your code, it doesn’t mean it has to be the only remote hosting provider that you use. You can use a different provider (BitBucket, Gitlab, etc.) if you so choose.
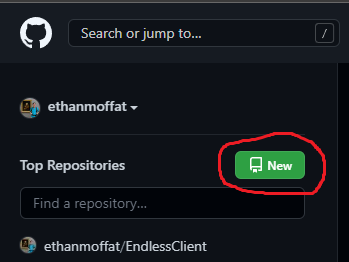
Prerequisite: Create a remote repo
In Github, create a new repository. This is required so that you have somewhere to ‘push’ your local copy of your code later.
You can name this repository whatever you want. It should match the folder you create locally.
You can leave the other options set to their defaults, but they provide some helpful auto-generated files that are pretty nice to have when working with open source:
- README: this is what is shown on the project page when you browse to it in GitHub. You can add information about the project, instructions for building, etc.
- .gitignore: this is a file that allows you to specify filters that are ignored by the git source control system. They are often language-dependent.
- License: open-source licensing is an interesting topic I’m not going to cover in this series. I highly suggest reading a summary of what different licenses mean/allow. I tend to lean towards the MIT license, as it is the most permissive.
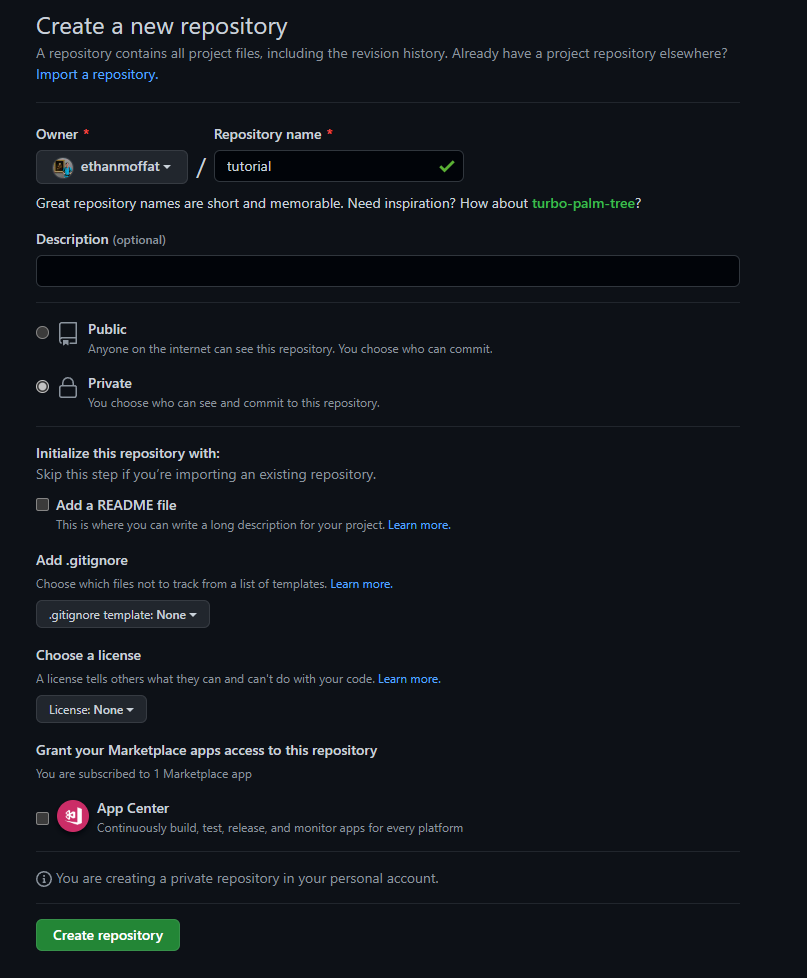
In the example, I am creating a new private (not visible when searching/browsing) repo under my personal account named “tutorial”. I am not creating a readme, adding a license, or adding a gitignore.
Prerequisite: Configure git
The commands below assume you have git configured and working locally. There are a couple configuration items you need to set up if you want things to work seamlessly. This includes setting up your display name and email address.
git config --global user.name "Ethan Moffat"
git config --global user.email "ethan@moffat.io"
These should be the only prerequisites to using git commands, and are only required when attempting to run git commit, or any operation that involves making a commit in git history.
Set up a local folder
Now that the repo has been created in GitHub, you have a couple of options for how to link it to your local code.
I usually create a dedicated folder on my system to house git repositories. On my primary development workstation, this is D:\git\personal. On my Linux VMs it is usually ~/git. Before running any of the below commands, create this directory and open a terminal there.
Option 1. Copy the repo from remote to local
This is a better option when you created one of the default files (License, Readme, gitignore) when creating the repo.
git clone https://www.github.com/ethanmoffat/tutorial.git
This copies your repo from the remote (github) to your local PC and sets up the linking so that you can commit / push changes from your local back to the remote.
If you want to specify a different folder (e.g. localcopy), you can add an extra argument to the end of the command:
git clone https://www.github.com/ethanmoffat/tutorial.git localcopy
However, in most cases, you should keep the name of the remote repository consistent with the name of the folder in which it is stored.
Option 2. Copy a local folder to the remote repo.
This is probably the option you’ll take most frequently. You’ve been developing code locally (or are just starting development) and want to back it up in a remote repository. You create the GitHub repository, and now it’s time to copy it over.
For tutorial purposes, if you don’t have any code, create a local directory tutorial somewhere and add a README.md file to it. Add whatever content you want in this file.
mkdir tutorial
cd tutorial
echo "# Hello, World! > README.md"
Now, initialize the local repository, commit the README file, and push it to the remote.
git init
git add README.md
git commit -m "Add README"
git remote add origin https://www.github.com/ethanmoffat/tutorial.git
git push -u origin master
This pushes your commit history (the single commit with the description “Add README”) for your local branch master to the remote repository ‘origin’ identified by ‘https://www.github.com/ethanmoffat/tutorial.git'.
I created one of the default files in GitHub but have code locally already! How do I deal with it?
If you’ve already created a README, License, and/or gitignore file when creating the remote repository, the remote repository will already have a branch ‘master’ (or ‘main’, depending on your github profile settings). This branch has a single commit with the initial files added. You will need to pull this commit to your local copy of the repository before you make your local commit adding your changes.
Assuming a local directory ’tutorial’:
cd tutorial
git init
git remote add origin https://www.github.com/ethanmoffat/tutorial.git
git pull origin master
git branch --set-upstream-to=origin/master master
git add .
git commit -m "Add local files"
git push
This series of commands does the following:
- Add the github remote with the name ‘origin’
- Pull the master branch from the remote repository to your local folder
- Map the local master branch to the remote master branch
- Add/commit the local files you want tracked in source control
- Push the files to the remote repository
The end result is that the default files (license/gitignore/readme) created by GitHub are now added as the first commit, with your local files added as the second commit.
Standard workflow
Now that we have a repository on GitHub, a copy of the code locally, and everything synced, we can get started on development!
There are only three commands you need to know for the standard workflow:
1. git add .
This “adds” or “stages” files that you want to commit to git history. In git, you have the option of only committing certain files. This is nice for breaking up large changes into smaller commits. Files that will be added to your commit are “staged”, and files that exist in your local copy remain “unstaged”.
If you want to add only a specific file, you can specify the relative path instead of .. If you want to add files using a wildcard filter, you can do things like git add ./**/*.cs to add all files with a .cs extension.
Remember that .gitignore file that allows you to exclude certain files from git? That file is implicitly used by git add so you don’t add anything that’s unnecessary in source control. This includes things like build outputs, IDE-generated caches, etc.
I’m not going to cover all the use cases of git add here, just know that if you want files to appear in a commit in your git history, this is the first step before committing.
2. git commit -m 'Your commit message'
This saves everything in the “staged” files to a new commit with the message passed to the -m argument. A new commit hash is created, and your git history is updated.
If you already know you want to add everything that you’ve edited locally, you can do git commit -a -m 'Your commit message', where the -a indicates “all local changes”. Note that this does not include “untracked” files, which are new files that have been created but not added to git yet via git add.
3. git push
This is how you copy your git history from your local repository to a remote repository. In this case, we’ve already done the groundwork for a few things:
- The remote ‘origin’ is used
- The remote branch ‘master’ is used
These are arguments to git push, but are implicitly taken from the current branch configuration.
Wrapping up
That’s it! You know everything you need to know to start using git in your day-to-day workflow. When working on a personal project, you really don’t need more than the commands mentioned above.
Future portions of this series will expand on more advanced workflows and features, including more enterprise-y stuff like Pull Requests, branching, rebasing, and some conventions/best practices.